
Let's Remember How to Play Oath
A refresher for your first full game: the turn, every action, Campaigns and the Chronicle, with a practice quiz at the end.
Oath keeps a record of every game you play, and the Chronicle at the end is how you write it down. If it has been a while since you sat down with it, this page is your refresher: the turn, every action, Campaigns and the Chronicle, in the New Foundations rules, written with a three-player first game in mind.
Every piece below has three layers. What to do is the rule, in plain steps. Why is the reason it works that way. In the story is the Chronicler, the voice that writes your game into history, telling you what it all means. Read as many layers as you need.
This is a refresher, not the rulebook, and when the two disagree the book wins. Page numbers point to the New Foundations rulebook (June 2026). Tap through the tabs, try the calculator, and take the quiz at the bottom before you sit down.
Your turn in one breath
Every turn has three phases, in this order: Wake, Act, Rest. Tap through them.
Wake: check for a win, then use your Wake powers
If you're an Exile and you hold the Oathkeeper title, flip it to its Usurper side. (Not yet in your first game, until the Usurper Limiter marker is gone.) If it's already on its Usurper side, you win.
If you're an Exile with a revealed Vision and you meet its goal, you win.
Use any Wake powers you have, once each. One you always have is Take Wealth: take 1 favor or 1 secret from your site, as long as no enemy pawns are there.
Wins are checked before you do anything, so the Usurper title takes two of your turns. Flip it at the start of one, hold it through everyone else's, and win at the start of your next.
The record shows you rose before anyone asked you to. History tends to favor the early riser and mislay the late one.
Rulebook page 17.
Act: spend Supply on major actions, and do minor ones for free
Take actions in any order, the same one more than once, or none at all.
Major actions cost Supply. Each point you spend moves your Supply marker one space to the right. They are Search, Travel, Campaign, Muster, Trade, Forge, Recover and Challenge.
Minor actions are free. You can peek at relics, negotiate with pawns at your site, use Action powers, and more. The next section has all of them.
Supply is the only limit, so every turn is a budget. A good habit is to ask what you want at your site first, and then work out how to get there.
No one has ever finished a turn with everything they wanted. The Chronicler notes that this is what makes it a turn.
Rulebook page 17.
Rest: clean up, then refresh your Supply
First, use any Rest powers, once each.
Second, clean up. Favor on cards goes back to the favor bank that matches the card's suit. Secrets on cards come back to your board. Your facedown secrets flip faceup.
Third, refresh your Supply. Move your marker to the space showing the number of warbands in your warband bank (the pile beside your board, not on the map and not on your board). Then move it one more space left for each Supply you didn't spend.
Mustering costs you twice. It spends Supply now, and every warband you pull out of the bank means less Supply next turn. Saving Supply pays you back on the next refresh.
The banners come down, the favors go home, and the realm exhales. Hanging upside down is optional.
Rulebook page 18.
When everyone has had a turn
The round ends once each player has taken a turn. Move the round marker up one space.
In a game with no Empire, like your first, the Oathkeeper can only flip to Usurper from round four on. The Usurper Limiter marker comes off at the end of round three.
If nobody has won by the end of round eight, check War Exhaustion (skip its first and last steps). If that doesn't produce a winner, the Oathkeeper wins. With no Oathkeeper, pick a winner at random.
Eight rounds is a hard stop, so a quiet table can't stall forever. The Oathkeeper is the one the game favors when everyone dithers, which is a good reason to want the title.
The Chronicler counts eight rounds and then puts the pen down. Whatever you haven't done by then, you did not do.
Rulebook page 19.
Words you'll see
Twelve terms you'll find on every card and board.
Supply
Your budget for major actions. Every point you spend moves your marker one step along your track. It refreshes in your Rest phase based on how many warbands are still sitting in your warband bank, so a bigger army means a leaner next turn. Supply you didn't spend earns a little extra on the refresh.
Every turn is a budget, so know your number before you start. Unspent Supply earns extra next turn.
Every ruler learns the same arithmetic. There is never enough, and it always comes due.
Pawn and your site
Your pawn is the marker that shows where you are on the map. When an action says your site, it means the site under your pawn, not every site you happen to rule.
Most actions work at your site, so where you stand decides what you can do. Travel first, then act.
You can't rule from the road. Eventually you have to stand somewhere and be accountable.
Sites and ruling
Sites are the places on the map, and each one holds a limited number of denizens. You rule a site if you have any warbands on it. The bandits can rule one too.
Ruling a site is how you hold ground, use its cards and win the Oathkeeper title. Only warbands of one color can stand on a site, and the bandits fill an empty one right away.
The land doesn't care who rules it. The Chronicler does, because someone has to write it down.
Denizens
The cards that fill the map's sites, or that you hold as advisers. An empty denizen has no favor and no secrets on it.
Cards at your site are what you Muster and Trade on. Cards you hold as advisers make those actions pay more.
The realm is full of people with opinions. A few of them will work for you.
Suits
There are six: Arcane, Beast, Discord, Hearth, Nomad, and Order. Two cards match when they share a suit.
Matching suits make Muster and Trade pay more, so the suits of your faceup advisers matter.
Six ways of wanting something. Most of history is two of them disagreeing.
Favor
Favor comes out of six banks on the map, one for each suit. Favor you put on a card goes back to that suit's bank during your Rest phase.
Favor pays for Muster, Trade and some powers. What you place on a card goes back to the map's favor bank at Rest, not to you.
Goodwill is the only currency the realm trusts, and it spends like any other.
Secrets
Secrets are hard to come by, and they come from the shared bank. Secrets you put on cards return to your board during Rest, and any facedown secrets flip faceup then.
Secrets you place on cards come back to your board at Rest. Secrets you burn go back to the shared bank for good. They're hard to get, so be careful with your last one.
A secret keeps best when only you know where it is. That's also when it's worth the least.
Warbands
Your armies. They sit on your player board (that's your force in a campaign), on sites to hold them, or in your warband bank, the pile beside your board.
More warbands on your board means more attack dice. More warbands in your warband bank means more Supply next turn. You'll feel that trade every time you Muster.
Armies are the only argument that always gets a reply.
Advisers
Up to three denizens beside your board, faceup or facedown. Facedown ones work like a hand of cards and have no suit or power until you flip them up.
Faceup advisers add to Muster and Trade when their suit matches. Facedown ones are a hand of cards you can play later.
Everyone listens to advice. Few take it. The ones who do tend to get written about.
Relics and banners
Relics are treasure cards. The People's Favor and the Darkest Secret are the two banners, and one player holds each at a time.
Relics and the two banners are what a Raid takes and what several win conditions count. Hold what you can and add to the banners to protect them.
Treasure is just history you can carry. It's also heavy.
Visions
Special cards mixed into the world deck. An Exile who reveals one wins by meeting the goal printed on it.
In a game with only Exiles, a Vision is a second way to win besides the Usurper title. Visions can't be revealed by the Chancellor or Citizens.
A Vision is a dream with a deadline.
Exiles
Everyone is an Exile in your first game: a lone schemer with no Empire behind them. Later games can add a Chancellor and Citizens, who play as the Empire.
Everyone starts as an Exile and wins by becoming the Usurper or completing a Vision. If you win, you become the Chancellor.
Nobody in the hinterlands asked for a throne. They just kept noticing who was sitting on it.
Every action
Major actions cost Supply and minor actions are free. Filter by kind, or look for the ones that are new or changed in New Foundations.
Search
Major action. Cost: 2 to 4 Supply.
This is how new people turn up in your life. You reach out, the world hands you three denizens, and you pick the one you want. The other two slip away facedown into the next region over, which means every Search quietly stocks someone else's discard pile.
- Pick your source: the world deck, or the discard pile for the region your pawn is in. A discard pile always costs 2 Supply. The world deck costs whatever the Visions Drawn track beside it shows, anywhere from 2 to 4.
- Draw three cards, one at a time.
- Keep one and discard the other two facedown, to the next region out from your pawn. From the Cradle they go to the Provinces pile, from the Provinces to the Hinterland pile, and from the Hinterland around to the Cradle pile.
- Play your keeper to your site, to your advisers, or straight into the discard if you change your mind.
Searching is how cards reach your table at all. Play one to your site and you take a favor of its suit, which the rulebook points out is an easy fix when you're running low. Play one to your advisers and it starts adding to every Muster and Trade where its suit matches. Or tuck it away facedown and treat it like a card in hand.
Three travelers came to your door and you kept one. The other two went looking for someone else's.
If you draw a Vision from the world deck, you stop drawing right there and the Visions Drawn track moves up one. A Vision from a discard pile doesn't stop you. A card with a tree under its suit can only go to your site, and a card with a person can only go to your advisers, though either kind can go facedown. A full site can't take another card (a Homeland site lets you discard one first when you play a card of its own suit), and you can hold only three advisers, facedown ones included.
Two Visions have already come out of the world deck, so the track reads 3, and searching the world deck costs you 3 Supply. A discard pile would still cost 2.
Travel
Major action. Cost: 1 to 4 Supply.
Your pawn is you, out in the world. Almost everything on your turn happens at your site, the one your pawn is standing on, so Travel decides what the rest of your turn can even be. Want to Muster on a particular card, Recover a relic, or raid a rival? Go stand there first.
- Choose the site you want to reach.
- Pay Supply, based on the regions you're leaving and entering. From the Cradle it's 1 to the other Cradle site, 2 to any Provinces site, and 4 to any Hinterland site. From the Provinces it's 2 to any other site. From the Hinterland it's 3 to either other Hinterland site, 2 to any Provinces site, and 4 to any Cradle site.
- Move your pawn there.
Because your actions work where your pawn stands, Travel is how you reach the cards worth Mustering or Trading on, the relics worth Recovering, the forge you want to use, or the rival pawn you plan to raid.
Distance is the oldest tax. The Chronicler records that mountains charge extra.
Some sites change the price. A Mountain makes the trip cost 1 more. An Island costs 2 more, unless you're leaving from a Coast or another Island. A Coast makes the trip to another Coast or Island cost just 1, and it ignores those add-ons. A Pass keeps you out of its region unless its ruler agrees, or you rule it yourself, and the bandits never agree.
A player travels from a Cradle site to a Hinterland site that is also a Mountain. That's 4 Supply for the trip plus 1 for the Mountain, 5 in all.
Campaign
Major action. Cost: 2 Supply. Changed in New Foundations.
Campaign is Oath's war. You spend 2 Supply, gather your warbands, and either march on a site somebody else rules or ambush a rival pawn standing at yours. Dice decide it, with a little help from sacrifice, battle plans, and however much you were brave enough to target. The Campaign card walks all eleven steps in order.
- Choose a type. In a conquest, whoever rules your site is the defender (it can be the bandits). Your site is a target, and you can add any other sites that same ruler holds. In a raid, the defender is a rival pawn at your site. The pawn is a target, and you can add any of their faceup relics and banners, or none.
- Both sides gather dice. The attacker takes up to one attack die for each warband on their board. The defender takes the defense dice the targets show, and a raid always adds two for the pawn.
- Battle plans come out, attacker first. Then the attacker rolls. Swords add up, skulls kill the attacker's own warbands, and the attacker may sacrifice more warbands to push the number higher.
- The defender rolls. Shields add up, doublers double them, and every warband the defender has in the fight adds one. If the attack beats the defense, the attacker wins. A tie goes to the defender.
- The loser kills half their force, rounding down. A conquest winner may move warbands onto the sites they took. A raid winner takes the targeted relics and banners, moves the defender's pawn to another site, makes the defender burn half their favor, and discards the defender's facedown advisers and relics.
It's the only way to take a site that somebody else rules, and the way to pry relics and banners out of a rival's hands. It's also the action that makes the whole table sit up a little straighter.
The Chronicler declines to say who was right. The Chronicler only counts who was left.
Every target you add gives the defender more dice, so aim at what you actually want. The attacker has to commit to sacrifices before the defender rolls, which means sometimes you won't know if it was enough until the dice land. And a raid no longer lets you hit the pawn and its site in the same campaign. That's what the split into conquest and raid is for.
Yellow raids the pink pawn at their site, so pink starts with 2 defense dice. Yellow also targets pink's Cursed Cauldron, which adds 2 more. Yellow has 5 warbands on their board, so they roll 5 attack dice.
Muster
Major action. Cost: 1 Supply. Changed in New Foundations.
Armies don't appear out of nowhere. You lean on someone at your site, put a favor on their card as the down payment, and a few warbands walk over from your warband bank to your board.
- Pick an empty denizen at your site (no favor and no secrets on it) and place a favor of yours on it.
- Gain 1 warband onto your board.
- Gain 1 more for every faceup adviser of yours that matches the suit of the card you just put the favor on.
Warbands are your force. The more you have on your board, the more attack dice you roll in a campaign, and warbands on a site are what make it yours. Muster pays best on a card whose suit matches your advisers. The catch is that warbands you've mustered are warbands out of your warband bank, and an emptier bank means less Supply when you refresh.
A promise makes a surprisingly good army, right up until someone has to feed it.
Facedown advisers don't count toward the bonus. You can only muster on a card at the site your pawn is on, not at other sites you rule. A card that already has favor or secrets on it is off limits, and that includes any card you already mustered or traded on earlier this turn. In the original game Muster gave a flat two warbands. Now it's one plus your matching advisers.
You muster on a Longbows card at your site. It's an Order card and you have no Order advisers, so you gain just 1 warband. With two faceup Order advisers you'd gain 3.
Trade
Major action. Cost: 1 Supply. Changed in New Foundations.
Trade is information for goodwill, or goodwill for information. Either way it happens over a denizen at your site, and that card is marked as spoken for until your Rest phase.
- Choose which way you're trading, then pick an empty denizen at your site.
- To get favor, place one of your secrets on that card. Gain 1 favor from the bank that matches the card's suit, plus 1 more for each faceup adviser of yours that matches that suit.
- To get secrets, place one of your favor on that card and burn one more favor (burned favor goes to the shared bank beside the map, not back to a suit bank). Then take 1 secret from the shared bank for each faceup adviser of yours that matches the card's suit.
The rulebook's own advice is that secrets can be hard to get, so trading for one is often a good idea, and spending your last secret early in the game often isn't. Trading for favor is also the quick way to refill when you're low.
Information is currency and goodwill is credit. The only question is who spends first.
Trading for secrets costs you two favor (one placed, one burned), and with no matching faceup advisers it pays nothing, so check your advisers first. The same site rules as Muster apply: it has to be an empty card at your own site.
You have a Nomad adviser and you trade with the Scryer at your site. The Scryer is a Discord card, so your adviser doesn't match. You take the base 1 favor from the Discord bank and nothing more. Trading for secrets there would have gotten you no secrets at all.
Forge
Major action. Cost: 1 Supply. New in New Foundations.
Some sites have forges. Rule one, pay what its corner asks for, and you walk away with a relic nobody else has seen yet, set facedown beside your board.
- Check the conditions. You need to rule your site, the site needs a Forge icon in its bottom right corner, and it needs 3 empty denizens.
- Look at that corner. It shows how much favor and how many secrets the forge costs. Place those tokens on the 3 empty denizens, one on each, in any order.
- Draw a relic from the relic deck and set it facedown by your player board. You can peek at it any time, and flip it faceup with a minor action.
Nothing is rolled. If you can meet the conditions and pay the price, you get the relic, which makes it the sure route next to Recover's dice.
Some things are made, not found. The price is written on the door.
Forge needs all three of those denizens empty. If the site has just three, a Muster or Trade there leaves you with two empty ones, and no Forge until Rest, so Forge first. The Supply cost is only 1, but the favor and secrets are the real price.
At the Painted Towers, the corner asks for 2 favor and 1 secret. You put one token on each of the three empty denizens, then draw your relic.
Recover
Major action. Cost: 1 Supply, plus more to roll again. Changed in New Foundations.
Relics sit at sites, facedown, waiting for someone to try for them. Recover is a gamble. You roll for the right to peek at what's there and take one.
- Pay 1 Supply and roll two defense dice. Count the shields. Every doubler you roll doubles the total number of shields, and doublers stack, so two doublers make it times four.
- Falling short? You can pay another 1 Supply, roll two more dice, and add them to everything you've already rolled. You can do that as many times as you can afford.
- Compare your shields to the Recover Difficulty, the number in the site's bottom right corner. Meet it or beat it, and you peek at the relics there, take one, and set it facedown by your board.
It's the dice route to a relic, and it works at any site with relics waiting, not only sites with forges. You decide how much Supply to throw at it as you go.
A relic won't hand itself over. You ask nicely first, and then the dice ask louder.
Each extra roll costs another Supply, so a hard site can eat a lot of your turn, and if you miss the number you walk away empty handed. Recover only takes relics now. Banners moved over to Challenge.
The difficulty is 4. You pay 1 Supply, roll a doubler and nothing else, and that isn't enough. You pay 1 more and roll two shields. The doubler from earlier doubles them, so you have four, and you take the relic.
Challenge
Major action. Cost: 1 Supply. New in New Foundations.
The two banners, the People's Favor and the Darkest Secret, belong to whoever can show the world they've earned them. Challenge is how you show it, with no dice involved.
- Pick the People's Favor or the Darkest Secret, as long as you don't already hold it. If an enemy holds it, your pawn has to be at their pawn's site.
- Check you can afford it. For the People's Favor you need more favor than is on the banner. For the Darkest Secret you need more secrets than are on it, and facedown secrets don't count.
- Take the banner. On their starting sides, the People's Favor sends all its favor back to the banks on the map, one at a time, to the bank with the least. The Darkest Secret puts half its secrets (rounded down) onto the sites with the least on them, and gives the rest to the previous holder.
- Put more on the banner than it had before.
A banner gives you its power while you hold it, and several legacy and Oathkeeper goals care about who holds them.
A banner is only as strong as the crowd that believes in it. Out-promise the holder, and the crowd walks.
Whatever you put on the banner becomes the number the next challenger has to beat, so a bigger stack protects you. And the old trick of taking a banner with Recover is gone.
You challenge the People's Favor, held by the yellow player. Its 3 favor go back to the banks, one each to Order, Beast, and Arcane. You take it and put 5 favor on it, one more than the minimum.
Explore
Major action. Cost: 1 Supply. New in New Foundations.
On a Wide Horizons map the world isn't finished. The last site slots stay empty, and an explorer can fill them in. This action only exists on that map.
- Make sure Foundation I is on its Wide Horizons side, and that your pawn is at the Hintermost site, the one furthest along the map.
- Pay 1 Supply and roll two defense dice, like Recover, with a difficulty of 4. If you fall short, you can pay 1 more Supply to roll two more and add them.
- On a success, take a site from the Atlas box and place it in the next Hinterward slot. Stock it the way Foundation I describes, then move your pawn onto it.
It grows the map, and you're the first one standing on the new site.
Past the last road, the Chronicler starts guessing. You'll be the proof.
Explore isn't a Travel action. It's not in your first game either, which uses a fixed setup with all eight sites already on the map. Wide Horizons shows up in later games, like one that starts with no Chancellor, or when a legacy flips Foundation I.
In the rulebook's example, an explorer stands at the end of the map and rolls two shields. They need four, so they pay 1 more Supply and reach it. A new site goes on the map and their pawn moves in.
Play or discard a facedown adviser
Minor action. Cost: Free.
- Peek at the card if you like. You can peek at your facedown advisers at any time.
- Play it faceup, either to your site or to your advisers, or discard it. It works exactly like finishing a Search, and the same restrictions apply.
- If you discard it, send it to the next region out from your pawn, like any Search discard.
A facedown adviser has no suit, no power, and no restrictions, which makes it a card you're keeping in reserve. Whenever you want, you can pull one up and treat it as if you'd just drawn it.
Advice, like bread, keeps best in the dark until someone is hungry.
You can hold three advisers in all, and facedown ones count. Once an adviser is faceup, you can't get rid of it just because you want to. You only discard one when you need room for a new adviser or the game forces it.
You peek at a facedown adviser and find it has the tree restriction, so it can only go to your site. You play it there and gain a favor from that suit's bank, as you would for any card played to a site.
Use an Action power
Minor action. Cost: Free.
- Pick an Action power you have access to. That means a faceup power at your site, or a faceup power on anything you rule: advisers, relics, and cards at sites you rule.
- Pay its cost, if it has one. A cost can be placing a favor on the card, burning a favor, placing a faceup secret on it, or burning a faceup secret.
- Do as much of what it says as you can.
Some cards let you do something on your turn. Their power starts with the word Action, and you can use one any time during your Act phase.
Everyone in the room is good at one thing. The cards say what.
A power with a cost needs an empty card. If favor or secrets are already sitting on that card, you can't pay. The action itself costs no Supply, but the power's own cost still has to be paid.
Reveal or peek at relics
Minor action. Cost: Free.
- Peek at the relics at your site. You can keep peeking at them any time while they're still there.
- Peek at your own facedown relics whenever you like.
- Flip a facedown relic of yours faceup, where its power counts.
Relics are mysteries until someone looks. This is how you look, and how you show the table what you're holding.
A relic you've seen is a relic you can plan around. Nobody else needs to know that you know.
Peeking is private. Nobody else sees the front of the card. Relics you've just taken from Forge or Recover come in facedown, so this is how you turn them over.
Move warbands
Minor action. Cost: Free.
Armies on the map hold ground. Armies on your board fight for you. This is how you shift them between the two.
- Move any number of your warbands from your site to your board, except the last one at that site.
- If you rule your site, you can also move any number of warbands from your board onto it.
Warbands on your board are your force for a campaign, and warbands on a site are what keep it yours. Rearranging them before you fight or after you muster is how you set that up.
Armies do what armies do best, which is stand where they're told.
You can't pull the last warband off a site, which is what keeps you ruling it.
Negotiate
Minor action. Cost: Free.
- Pick any number of players whose pawns are at your site.
- You can give each other favor and relics. The trade doesn't have to be even, but both sides have to agree. You can't swap secrets or banners.
- You can also show each other hidden information, like facedown advisers or relics, and what you've peeked at.
This is the table talk, made official. If someone's pawn is at your site, you can sit down with them and deal.
Promises cost nothing and are worth the same. The Chronicler has watched both used well.
You can promise anything you like, and nothing makes you keep it. Outside of a negotiation, players can't coordinate unless their pawns are at the same site, so agree on your table talk limits before the first game. In a game with an Empire, the holder of the Grand Scepter can offer Citizenship during a Negotiate.
Add to a banner
Minor action. Cost: Free.
- If you hold the People's Favor or the Darkest Secret, place favor or secrets on it as a minor action.
- The more it has, the more a rival has to beat to take it with Challenge.
A banner you hold is a pile of favor or secrets that someone else would like to beat. Stacking more on it is your defense.
More on the banner means more crowd between you and the next challenger.
This replaces the old way of adding to banners with Recover. On its starting side, the Darkest Secret also has minor actions of its own: move your pawn to any site with a secret on it, which isn't Travel and costs no Supply, or place a secret on your site.
Self-exile
Minor action. Cost: Costs favor.
Citizens serve the Chancellor, and sometimes they decide they're done. Exiling yourself is how you leave.
- As a Citizen, give the Chancellor 1 favor for each Imperial warband on your board, but never fewer than 3.
- Flip your board to its Exile side and swap the Imperial warbands on it for ones in your own color.
- Your Act phase ends, and your Supply refreshes.
Exiles can reveal a Vision and go after the Usurper win. Citizens can't.
Every empire loses someone. Leaving takes nerve and a handful of favor.
This is for games with an Empire. Your first game has no Chancellor, and everyone is already an Exile.
Campaigns, one step at a time
The Campaign is the longest action in the game and the one most likely to send you back to the rulebook. Pick Conquest or Raid, then step through the eleven steps in order.
1. Choose your type and targets
Campaign costs 2 Supply. You pick one of two kinds.
Conquest. You attack your own site, and an enemy has to rule it. The ruler is the defender, and that can be the bandits.
You must target your site. You may also target any number of other sites the same defender rules.
Raid. You attack an enemy pawn at your site. That pawn's player is the defender.
You must target the pawn. You may also target any number of that player's faceup relics and banners, or none.
Every target brings its defense dice into the fight. Aim at what you actually want and leave the rest.
Before the dice, there is the reason. The Chronicler asks that you decide what you are fighting for before the dice decide it for you.
2. Gather the dice pools
You take up to one attack die for each warband on your player board. Those warbands are your force.
The defender takes the defense dice shown on your targets.
Each targeted site adds the defense dice printed on it.
The pawn always adds two defense dice, shown on its owner's board. Each targeted relic or banner adds the dice shown on it.
Rulebook example: yellow raids the pink pawn at their site, so pink starts with two defense dice. Yellow also targets pink's Cursed Cauldron for two more. Yellow has five warbands on their board, so the attack pool is five dice.
Only the warbands on your board fight for you. Warbands you've left on the map are holding ground, not swinging swords.
Armies don't come when they're called. They come when they're counted.
3. Use battle plans
The attacker uses the battle plans they rule first, each once, in any order. Then the defender does the same.
A facedown plan has to be played faceup to be used. Red plans are for attackers, blue for defenders, and gradient ones for either. The bandits use plans they rule that cost no favor or secrets.
Remember the Oathkeeper title. It carries a defensive battle plan of its own.
Plans can move the numbers before anyone rolls. Check what you rule and what the defender rules.
The clever ones win the argument before it starts. The rest of us have to roll.
4. The attacker rolls
Roll your attack pool and count your attack value. Each sword adds 1. Every two hollow swords add 1.
Each skull kills one warband on your own player board. If you have none to kill, that die's swords don't count.
Skulls are the cost of swinging hard. A big roll can cost you a few of your own.
Even the victor leaves a few of their own behind. The Chronicler does not put this on the banners.
5. Sacrifice warbands, if you like
Before the defender rolls, you may kill warbands on your player board. Each one you kill adds 1 to your attack value.
Sacrifice is your last lever, and you pull it before you see the defense roll. Sometimes you win by one. Sometimes you paid for nothing.
There is a kind of courage that is mostly arithmetic.
6. The defender rolls
Roll the defense pool and count the defense value. Each shield adds 1. Each doubler doubles the shields rolled, and doublers stack: times four, times eight, and so on.
Then add 1 for each warband in the defender's force.
In a conquest, the defender's force is their warbands at the targeted sites.
In a raid, the defender's force is their warbands on their player board.
Doublers double the shields, and the warbands are added on top. A big stack of warbands is steady, and a doubler is a gamble that sometimes pays.
Defense is mostly the patience to still be standing there.
7. Declare the victor
If the attack value is higher than the defense value, the attacker wins and the defender is defeated. Otherwise the defender wins and the attacker is defeated.
So a tie goes to the defender.
The attacker has to beat the number. A tie is not enough.
History is kind to whoever was already standing there.
8. Kill the defeated player's warbands
The defeated player kills half of the warbands in their force, rounded down. The rest move to their player board.
If you defeated the bandits, kill every bandit warband at the targeted sites.
Rulebook example: a defender is defeated in a conquest. The targeted sites hold five warbands, so two are killed and three return to the defender's board.
Losing costs half, not all, and the rounding is on the loser's side. It hurts, but you're not out of the game.
The Chronicler rounds down. The Chronicler is not entirely heartless.
9. Resolve a conquest victory
The attacker may place any number of their warbands from their force onto the targeted sites, even none.
Then any site with no warbands fills with bandits up to its capacity.
This step is for conquests only. In a raid, skip it.
Placing warbands is how you hold what you took. Leave a site empty and the bandits move straight back in.
A flag is only a flag until someone stands next to it.
10. Resolve a raid victory
This step is for raids only. In a conquest, skip it.
Do these in order. First, take the targeted relics and banners, adjusting each banner as its text says (on their starting sides, the People's Favor sends its favor back to the favor banks, and the Darkest Secret burns all its secrets).
Second, the defender's facedown advisers and facedown relics are discarded, along with any plans that started facedown and were played faceup. Those relics are out of the game until the Chronicle Phase.
Third, the defender burns half their favor, rounded down.
Last, move the defender's pawn to any other site. That is not a Travel action.
Rulebook example: the attacker takes the Cursed Cauldron. The defender has three favor, so burns one, and also discards their one facedown adviser. Then the attacker moves the defender's pawn to another site.
A raid is the heavy hitter. You take the treasure, wreck their reserve, and walk them somewhere else.
The Chronicler does not say it was fair. The Chronicler says it was recorded.
11. Use the remaining battle plans
Resolve any battle plans that happen "At End" or say "If you're victorious" or "If you're defeated."
Some plans wait until the result is known and then pay out, or sting.
Every war has an epilogue, and somebody always has more to say.
Count the fight
Not sure who won? Put in the numbers and it counts the way the rulebook does.
The attacker's value is the swords showing after any skulls, plus 1 for every 2 hollow swords, plus 1 for each warband sacrificed. A skull kills one of the attacker's warbands; with none to kill, that die's swords don't count. The defender's value is the shields, doubled once for each doubler, plus the warbands in the defender's force. The attacker wins only with more than the defender, so a tie goes to the defender. The loser kills half the warbands in their force, rounded down, and the rest return to that player's board.
The calculator needs JavaScript. The rule above is all it does.
Your first game
The first game is a little gentler than the full rules. Here's what is different and how the table goes together.
Who plays and who goes first
Everyone starts as an Exile. There's no Chancellor and no Empire.
Each round starts with the player holding the first player marker and goes clockwise.
Exiles can win in two ways: become the Usurper, or complete a Vision. There's no roll to end the game.
With no Chancellor to beat, the table is a free-for-all, and the winner earns the chair for the next game.
Three strangers walked out of the hinterlands. One of them is going to be in the history books. The Chronicler is watching all three.
Rulebook page 5, 6 and 19.
The map and the bandits
All eight sites go on the map faceup, one in each slot.
Each site gets the favor and secrets printed in its top-left corner, relics facedown equal to its relic slots, and bandit warbands equal to its capacity.
A Homeland site (a suit shield at the bottom left) starts with a ruined edifice of that suit.
Each of the six favor banks starts with 3 favor, plus 1 for each edifice of its suit on the map.
Every site starts ruled by bandits, so your first Campaigns are against them. They never compete for victory, but they do hold the ground.
The land was not empty. It was just waiting for someone to say whose it was.
Rulebook page 6, 7 and 14.
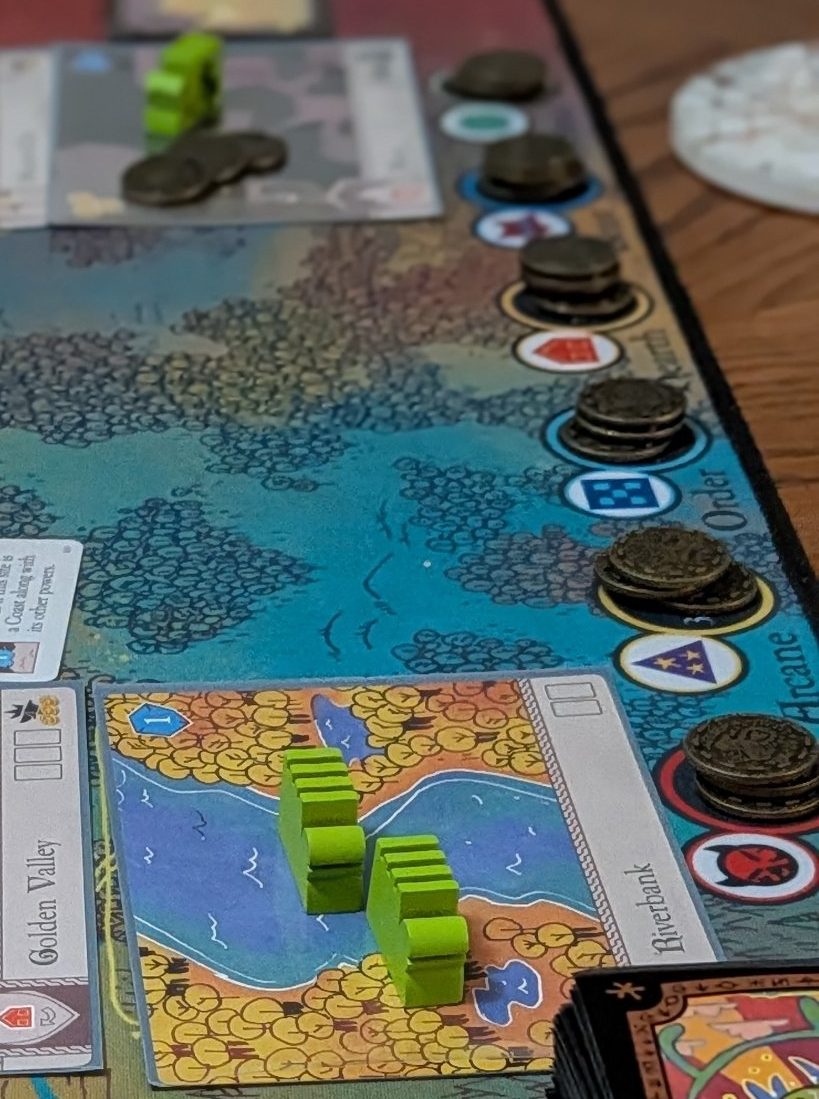
Your seat at the table
Take a player board on its Exile side, with 1 favor and 1 secret on it.
Collect the 14 warbands of your color and put three on your board. The rest are your warband bank.
Draw 2 legacies and keep 1 facedown. Starting with the first player, each player places their pawn on any site, picks a legacy, and keeps 1 of 3 dealt denizens as their first adviser. The other two go facedown to the next region's discard pile.
Three warbands on your board is a small force, and a full bank is a lot of Supply. Your first turns are about picking the first fight.
Each of you arrives with a banner, a bit of favor and one secret. It's more than most people get.
Rulebook page 7.
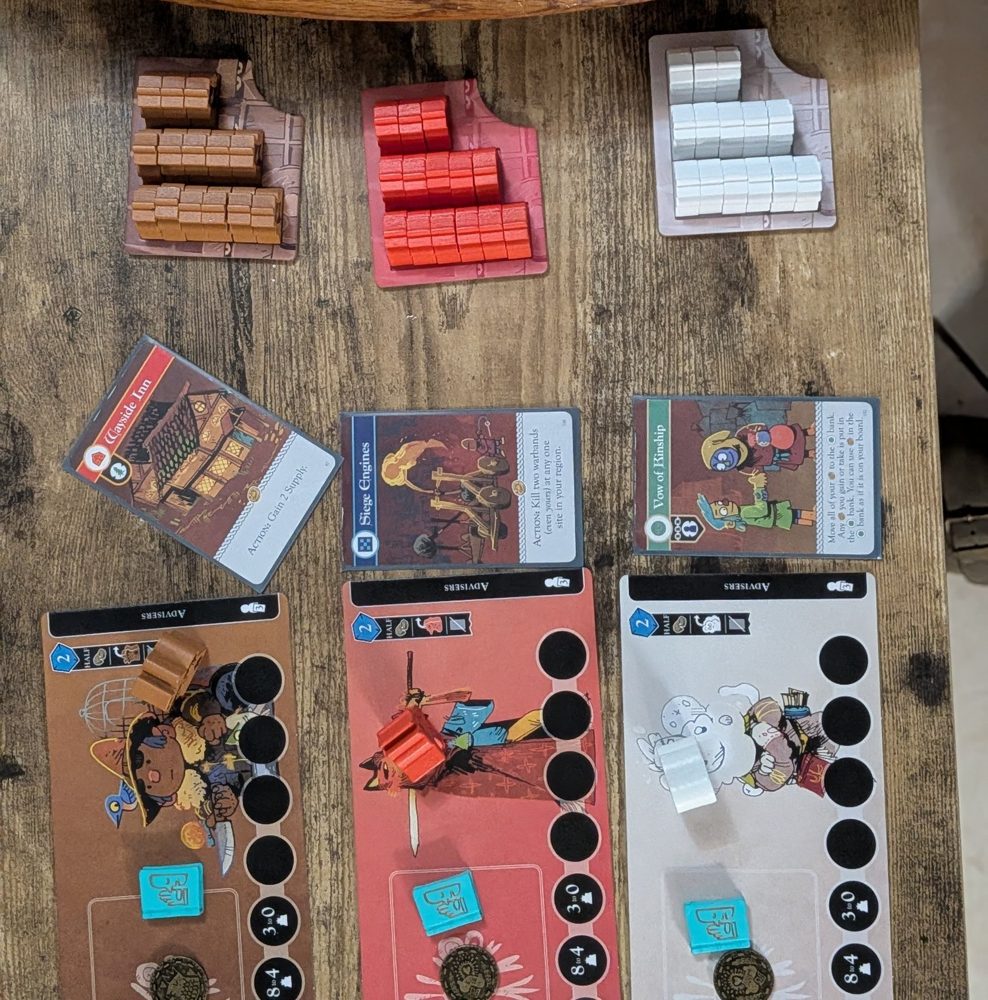
How you win
Nobody starts with the Oathkeeper title. In your first game, the Oathkeeper of Supremacy goes to the first player to rule a site, and then to whoever rules more sites than each other player. Sites ruled by the bandits don't count.
At the start of your turn, if you're the Oathkeeper, you flip it to Usurper, but only from round four on. Keep the Usurper title until your next turn, and you win.
Or complete a revealed Vision at the start of your turn.
Sites decide the Oathkeeper and the Oathkeeper decides the game. So you want to rule more than anyone else and stay alive long enough to be the Usurper.
The title changes hands the instant someone has more. It's the only thing in the realm that moves that fast.
Rulebook page 15 and 16.
If nobody has won
At the end of round eight, check War Exhaustion, skipping its first and last steps. An Exile who is the Usurper wins. Then an Exile with a revealed Vision who meets its goal wins.
If nobody wins that way, the Oathkeeper wins. If there's no Oathkeeper, pick a winner at random.
Even a stalemate has a winner, and it's the Oathkeeper. So if the table is quiet, make sure someone is the Oathkeeper.
The Chronicler does not like loose ends, and a stalemate is the loosest of all.
Rulebook page 19.
Afterward: the winner and the era
The winner is crowned Chancellor, and then you resolve the Chronicle (see below).
A run of games is an era. A win earns at least 3 lineage points, and sometimes 10 or more, tracked on the era scorepad.
Decide up front when your era ends. If you're not sure, end it at 20 lineage points. The player with the most points wins the era. Then points reset to 0 and everything else carries over.
A single game is a story, and an era is the book. You can bring new players in and out between games.
Eras end when the table says they do. The Chronicler keeps the receipts.
Rulebook page 5 and 37.
After the game: the Chronicle
When the game ends, you write it down. Tick what applies to you to see which task is yours, then read the five tasks in order.
Tick what applies to you at the end of the game.
If you won, you take the Throne. If you hold the People's Favor, you take the World. If you hold the Darkest Secret, you take the Beacon. If one player holds both the World and the Beacon, they must give one to someone else.
Task 1: The Sun (the whole table)
- Reveal all facedown relics. Then resolve legacies. Flip a dormant legacy whose goal you met to active, and discard one you didn't. Exiles flip active legacies they no longer meet back to dormant. Anyone with more than three active legacies discards extras.
- Crown the Chancellor. The winner becomes Chancellor and takes the Chancellor board, the purple pieces and the Grand Scepter. If an Exile won, the Empire breaks, and everyone else is an Exile.
- Assign the tasks. The winner takes the Throne. The People's Favor holder takes the World. The Darkest Secret holder takes the Beacon. If nobody holds a banner, the winner may give that task to anyone. If one player holds both the Beacon and the World, they must give one to someone else.
Legacies are goals you carry from game to game. Meet a goal and its legacy switches on, with powers for later games and bonus lineage points if you win.
First, the dead and the dormant are sorted. Then a head is crowned. The Chronicler has done this many times and still holds the pen steady.
The legacy goals are: hold the Grand Scepter, rule the most sites, hold the Darkest Secret, hold the People's Favor, rule the most cards of one suit (advisers count), or hold the highest-value relic. Bandits never compete for these. If there is no Grand Scepter, as in your first game, the winner meets the Grand Scepter goals. If any Exiles are tied for a goal, nobody meets it.
Rulebook page 36.
Task 2: The Throne (the winner)
- Offer Citizenship to any Exiles you like.
- Shape the Empire: remove any of your warbands from sites, except your last one on the map. Then discard denizens you don't rule, except intact edifices.
- Build an edifice: bury a denizen at a site you rule to place the matching edifice there.
- Stock the Reliquary: add all your relics except the Grand Scepter to it, facedown, then trim it to 5.
- Scatter relics: shuffle the discarded relics and the players' relics, and deal them facedown to empty relic slots, Cradle first, then Provinces, then Hinterland.
- Score lineage points: 3 for winning, plus 1 for each matching card at a site you rule for each of your legacies (advisers don't count). Spend 2 of your points to give another player 1.
- Swear an Oath: if you won by a Vision, set the Oathkeeper goal to match it. Otherwise pick a goal different from the current one.
This is the part where the winner shapes the world the next game starts in. It's the biggest set of choices in the Chronicle, and they're all yours.
The winner takes the Throne, which the Chronicler notes is mostly a chair with consequences.
Rulebook page 37.
Task 3: The World (the People's Favor holder)
- Gather all 5 Vision cards into a stack and set it aside.
- Shuffle all the denizens from the discard piles and the players' advisers together. Return all but 9 to the world deck without looking. Split the 9 into three stacks of 3 and flip two stacks faceup.
- Choose one faceup stack to protect. Secretly keep 1 of its denizens as your facedown starting adviser for the next game, and add the other 2 facedown to the world deck. The other two stacks go behind the Dispossessed divider in the box.
Some of the people who mattered in this game won't make it into the next one. The World task decides which.
Some of the people in the room won't be in the next story. The Chronicler regrets this and writes it down anyway.
Rulebook page 38.
Task 4: The Beacon (the Darkest Secret holder)
- Introduce newcomers. Choose three different suits and find those denizen stacks in the box (not from the Dispossessed or the Edifices). Draw three random denizens of the first suit, two of the second and one of the third.
- Welcome a stranger. Choose one of the drawn denizens to keep as a facedown starting adviser for the next game, and add the others facedown to the world deck.
- Shape a foundation. You may flip one foundation setup card from its altered side back to its normal side, unless an active legacy is altering it.
New faces keep the world from going stale, and you decide which suits they come from.
A stranger arrives, and no one knows yet what they're for. The Chronicler is rarely wrong about this.
Rulebook page 39.
Task 5: The Stars (the table, with the winner's constellation)
- Write in the stars: the winner draws and names any constellation on the back of the era scorepad. Three to eight stars near each other is a good size.
- Archive rival sites: for each site you don't rule, remove the pieces on it and stack its cards on top of the site card. Stack those sites going Hinterward and slide them into the Atlas box on its Recent Sites side.
- Clean up: return all pieces to their banks. Shift the sites you rule Cradleward so the only empty slots are Hinterward.
- Play again or store the game. To store it, store the Empire, the players, the world deck and the other pieces separately as the rulebook describes.
The stars are your record of the game. The rest is tidying up so the next game starts in the world you built.
Somewhere in the dark, a new constellation. The Chronicler would like it noted that you named it.
Rulebook page 40 and 41.
Practice quiz
Fifteen questions, in a different order every time. Every answer explains itself.
The quiz needs JavaScript. Here are all fifteen questions, with the answers.
Question 1
At the start of your Wake phase, you're an Exile holding the Oathkeeper title in round five of a game with no Empire. What happens?
You flip it to its Usurper side.
Wake checks for a win first. An Exile with the Oathkeeper flips it to Usurper. If it's already on its Usurper side, you win. (In your first game it can't flip before round four.)
Question 2
In your Rest phase, where does favor you placed on cards go?
Back to the favor bank that matches each card's suit.
Favor on cards returns to the map's favor banks by suit. Secrets on cards are different: they come back to your board.
Question 3
What sets how much Supply you refresh to?
The number of warbands in your warband bank.
Move your Supply marker to the space showing the warbands in your warband bank, then one more space left for each Supply you didn't spend.
Question 4
You Muster at a Nomad card. You have two faceup Nomad advisers and one facedown Nomad adviser. How many warbands do you gain?
3
You gain 1, plus 1 for each faceup adviser whose suit matches the card. Facedown advisers don't count, so 1 plus 2 is 3.
Question 5
Two Visions have been drawn from the world deck. What does a Search of the world deck cost?
3 Supply
A world deck Search costs the number shown on the Visions Drawn track. With two Visions drawn that's 3. Searching a discard pile always costs 2.
Question 6
You Travel from a Cradle site to a Hinterland site that is also a Mountain. What does it cost?
5 Supply
Cradle to Hinterland costs 4. A Mountain adds 1 more, so 5.
Question 7
You Trade for secrets. What do you do?
Place 1 favor on an empty denizen at your site and burn 1 more favor.
To trade for secrets you place a favor on an empty denizen at your site and burn one more. Then you take 1 secret for each faceup adviser whose suit matches the card.
Question 8
In a Campaign, the attack value and the defense value are tied. Who wins?
The defender.
The attacker has to be higher. A tie goes to the defender.
Question 9
How many defense dice does a raided pawn add on its own?
Two, shown on the defender's player board.
A raid always adds two defense dice for the pawn. Targeted relics and banners add the dice printed on them.
Question 10
You Recover at a site with difficulty 4. Your first roll shows one doubler and no shields. What can you do?
Pay 1 more Supply and roll two more dice, adding them to what you've rolled.
You can pay 1 more Supply any number of times to roll two more dice. They add to all the dice you've rolled, and a doubler doubles every shield rolled.
Question 11
What must be true to Forge?
You rule your site, it has a Forge icon, and it has 3 empty denizens.
Forge needs all three: you rule your site, the site has a Forge icon in its bottom-right corner, and it has 3 empty denizens. You place the printed favor and secrets on them and draw a relic.
Question 12
To Challenge the Darkest Secret, what do you need?
More secrets than are on it, not counting facedown ones.
Challenge the Darkest Secret with more secrets than it has, and facedown secrets don't count. For the People's Favor you need more favor than it has. If an enemy holds the banner, your pawn has to be at their site.
Question 13
Which of these costs no Supply?
Negotiate
Minor actions cost 0 Supply by default. Negotiate is one. Search, Challenge and Forge are major actions.
Question 14
After the game, who takes the Throne task?
The winner.
The winner takes the Throne. The People's Favor holder takes the World, and the Darkest Secret holder takes the Beacon.
Question 15
At the end of your first game, what happens to the winner?
They're crowned Chancellor.
The winner is crowned Chancellor to rule the Empire for the next game. Everyone else is an Exile, and the Chancellor may offer them Citizenship.
Ready to take a seat?
Now you're ready to sit down. Bring your copy of Oath to Open Seat Board Game Night, every Friday from 6 to 10 PM at Bat City Games & Comics, 5001 Highway 290, Austin, Texas 78735. It's free, and if you flub a rule, we won't bat an eye. Come play!